Many popular blogs or directories using buttons and images for their promotions. Badge is one of them which easy to implement and occupies less space on blogs. This small button can create a huge impact.
I have created many button using photoshop cs5 but it is very time consuming but thanks to cool text for amazing online badge creation tool. This maker provides you a huge options like color change, font change, width change, shadow etc. This tool is extremely easy to use and no expert tech skills are required to design a
button. However I will be sharing some tips which could be helpful for most of you. Follow these steps to create a beautiful badge for blogger..
Step 1. Go to Cool Text Website.. Go to Logos drop-down menu and select pixel badge option.
Step 2. In next step design your badge logo. you can change font, color etc.
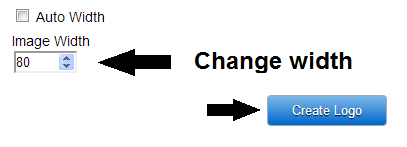
Step 3. After making changes just click on create logo button.
Step 4. Now you will get your designed badge for your blog or website, right click on the image and save image (see image below). Upload this image into your server and copy image code.
Step 5. Now go to blogger layout section..
Step 6. Click on HTML/Javascript widget..
Step 7. Click on Add a Gadget and paste following code..
Step 8. Paste these code in gadget and make changes.
Step 8. Save the widget. You can move widget to your best place. If you face any problem then drop your comments below. pl consider sharing this with your friends.
I have created many button using photoshop cs5 but it is very time consuming but thanks to cool text for amazing online badge creation tool. This maker provides you a huge options like color change, font change, width change, shadow etc. This tool is extremely easy to use and no expert tech skills are required to design a
button. However I will be sharing some tips which could be helpful for most of you. Follow these steps to create a beautiful badge for blogger..
How to create a beautiful looking badge image button with link.
Step 1. Go to Cool Text Website.. Go to Logos drop-down menu and select pixel badge option.
Step 2. In next step design your badge logo. you can change font, color etc.
Step 3. After making changes just click on create logo button.
Step 4. Now you will get your designed badge for your blog or website, right click on the image and save image (see image below). Upload this image into your server and copy image code.
Next steps add badge on to your blog..
Step 5. Now go to blogger layout section..
Step 6. Click on HTML/Javascript widget..
Step 7. Click on Add a Gadget and paste following code..
Step 8. Paste these code in gadget and make changes.
<center><div dir="ltr" style="text-align: center;" trbidi="on">Love bwidgets4all.com then show it by placing this little badge on your website.
<a href="http://www.bwidgets4all.com/"><img alt="bwidgets4all" src="https://blogger.googleusercontent.com/img/b/R29vZ2xl/AVvXsEgGxxUWgNkXyDXJBT2JJwj5efCtWz_i2mQjNb3VqfprK2ntTfB5LGsh-PMN4BsVa7cWu407QHXCpYz2a9nyXTdWRGFLij0n3F07UZhyphenhyphenyimGXfkruw-xMizM0Tx4VqBJFb2RbXCJpwOkcaq6/s1600/bwidget4all+badge.gif" title="bwidgetsall" /></a></div></center>
<center>
<input type="text" onclick="this.focus();this.select()" readonly value="<a href="http://www.bwidgets4all.com/"><img alt="" src="https://blogger.googleusercontent.com/img/b/R29vZ2xl/AVvXsEgGxxUWgNkXyDXJBT2JJwj5efCtWz_i2mQjNb3VqfprK2ntTfB5LGsh-PMN4BsVa7cWu407QHXCpYz2a9nyXTdWRGFLij0n3F07UZhyphenhyphenyimGXfkruw-xMizM0Tx4VqBJFb2RbXCJpwOkcaq6/s1600/bwidget4all+badge.gif" title="bwidgets4all" /></a>" />
</center>
Step 8. Save the widget. You can move widget to your best place. If you face any problem then drop your comments below. pl consider sharing this with your friends.


 Hi! I am K Ajay, currently live in Chandigarh, India. A young Web Designer, Pro Blogger, Graphic Designer & an addicted Web Developer. I love working on Blogger and WordPress using CSS Tricks,and Web Designing.

0 comments:
Important - Make sure to click the "Subscribe By Email" link below the comment for to be notified of follow up comments and replies.If you use Name/URL don't use keywords as your name (You Know Who You Are).
Post a Comment